Start Bajaj Geyser Repairing With Safe, Simple Checks
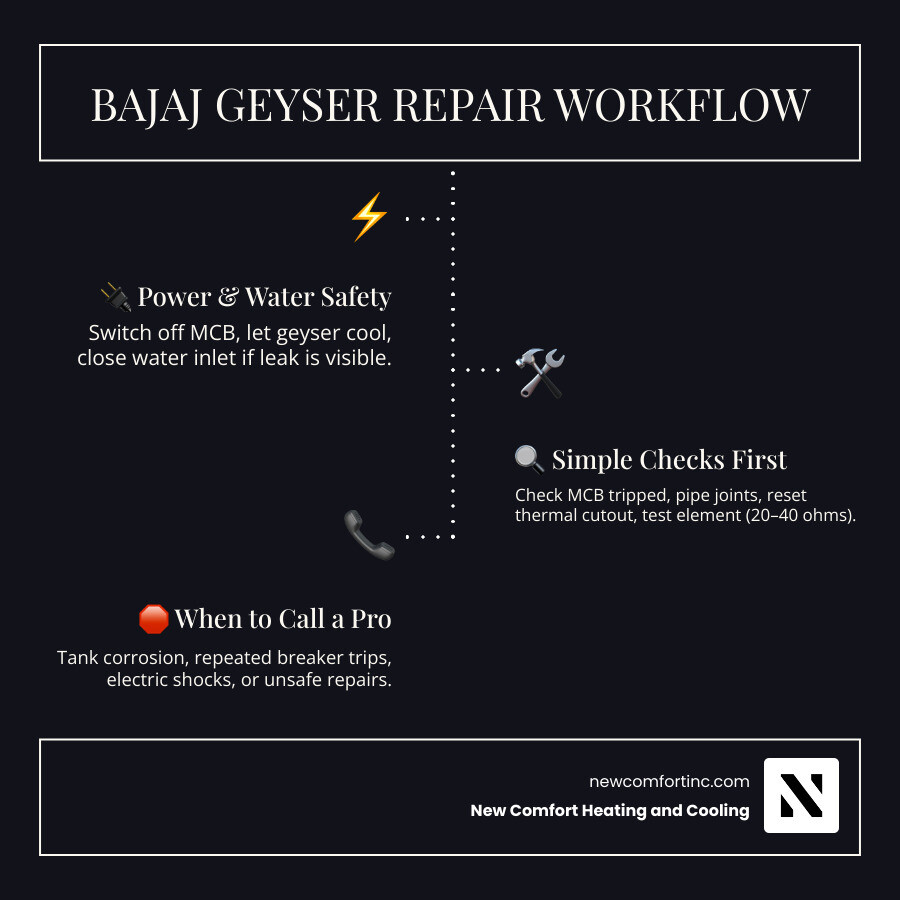
For Bajaj geyser repairing, start by switching off power at the circuit breaker, letting the unit cool, and closing the water supply if there is a leak. Then check the simplest causes first:
- Check whether the MCB has tripped and whether the geyser has power.
- Look for leaks at pipe joints, the pressure-relief valve, and the bottom flange.
- Reset the thermal cutout if the unit has stopped after overheating.
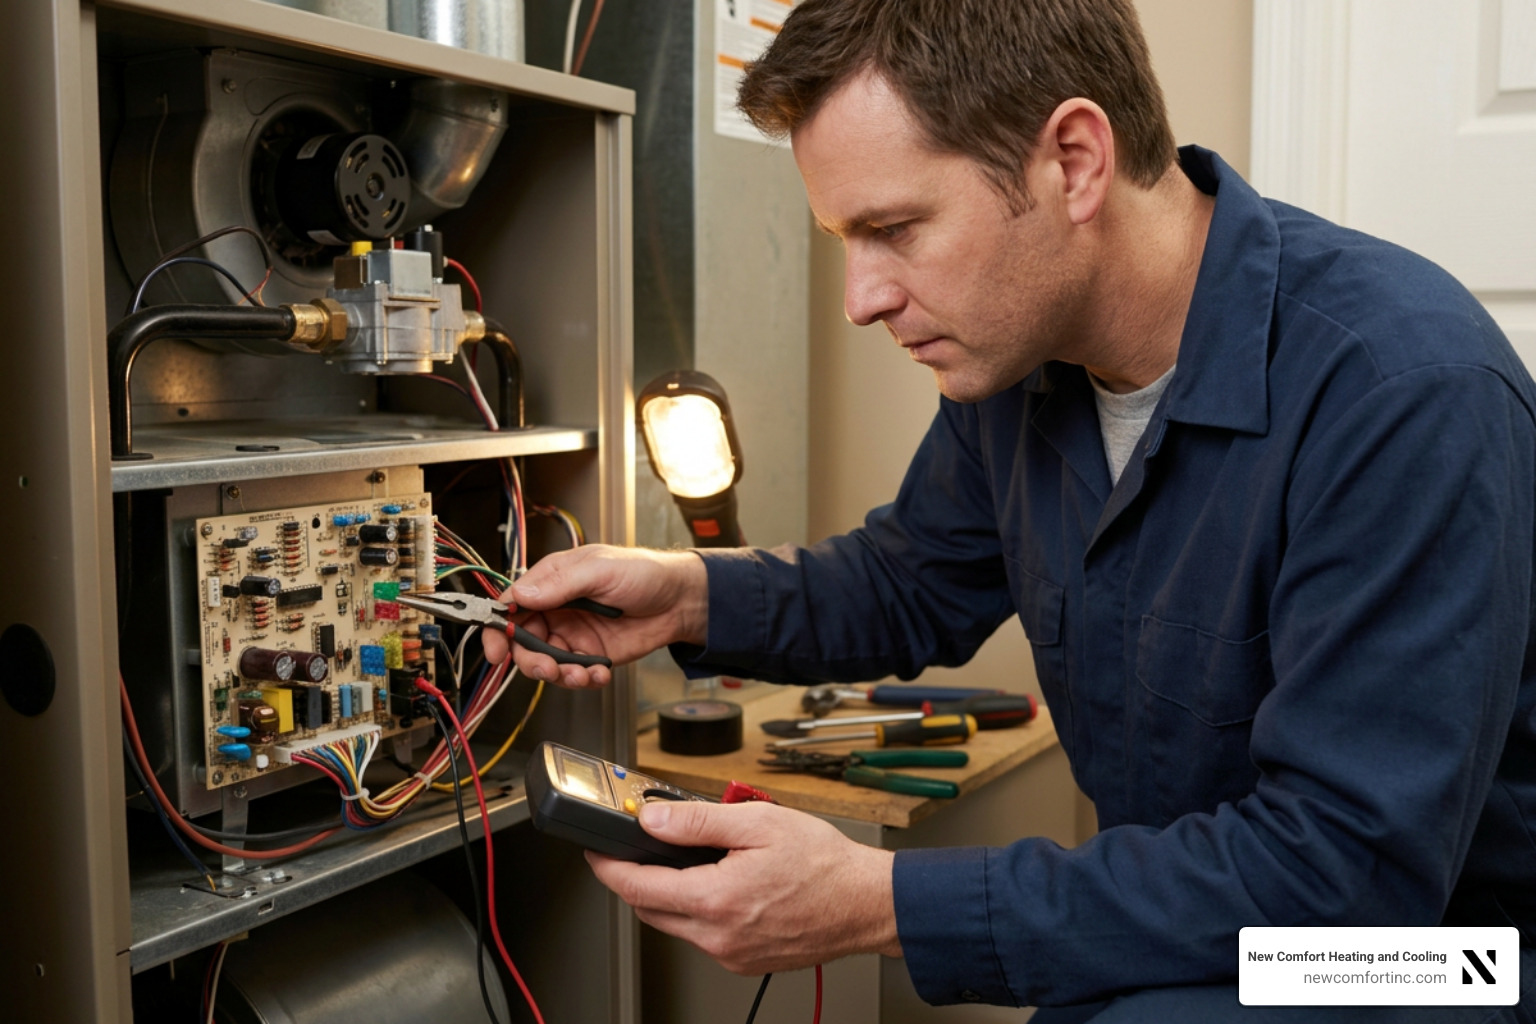
- Test the heating element with a multimeter. A working element commonly reads about 20 to 40 ohms; an open or grounded element needs replacement.
- Call a qualified technician for tank corrosion, repeated breaker trips, electric shocks, gas-unit faults, or any repair you cannot complete safely.
Most no-heat problems trace back to the element, thermostat, thermal cutout, wiring, or mineral scale. Popping sounds and slow heating often point to sediment buildup, while persistent leaks may involve a worn gasket, loose fitting, or faulty pressure valve. This guide walks through safe diagnosis, practical repairs, and maintenance that can help prevent another cold-water surprise.
Essential Safety and Diagnostic Protocols for Bajaj Geyser Repairing
Proper preparation is the foundation of any successful repair. Water heaters combine high-voltage electricity and pressurized hot water, so skipping safety checks can quickly lead to property damage or serious injury.
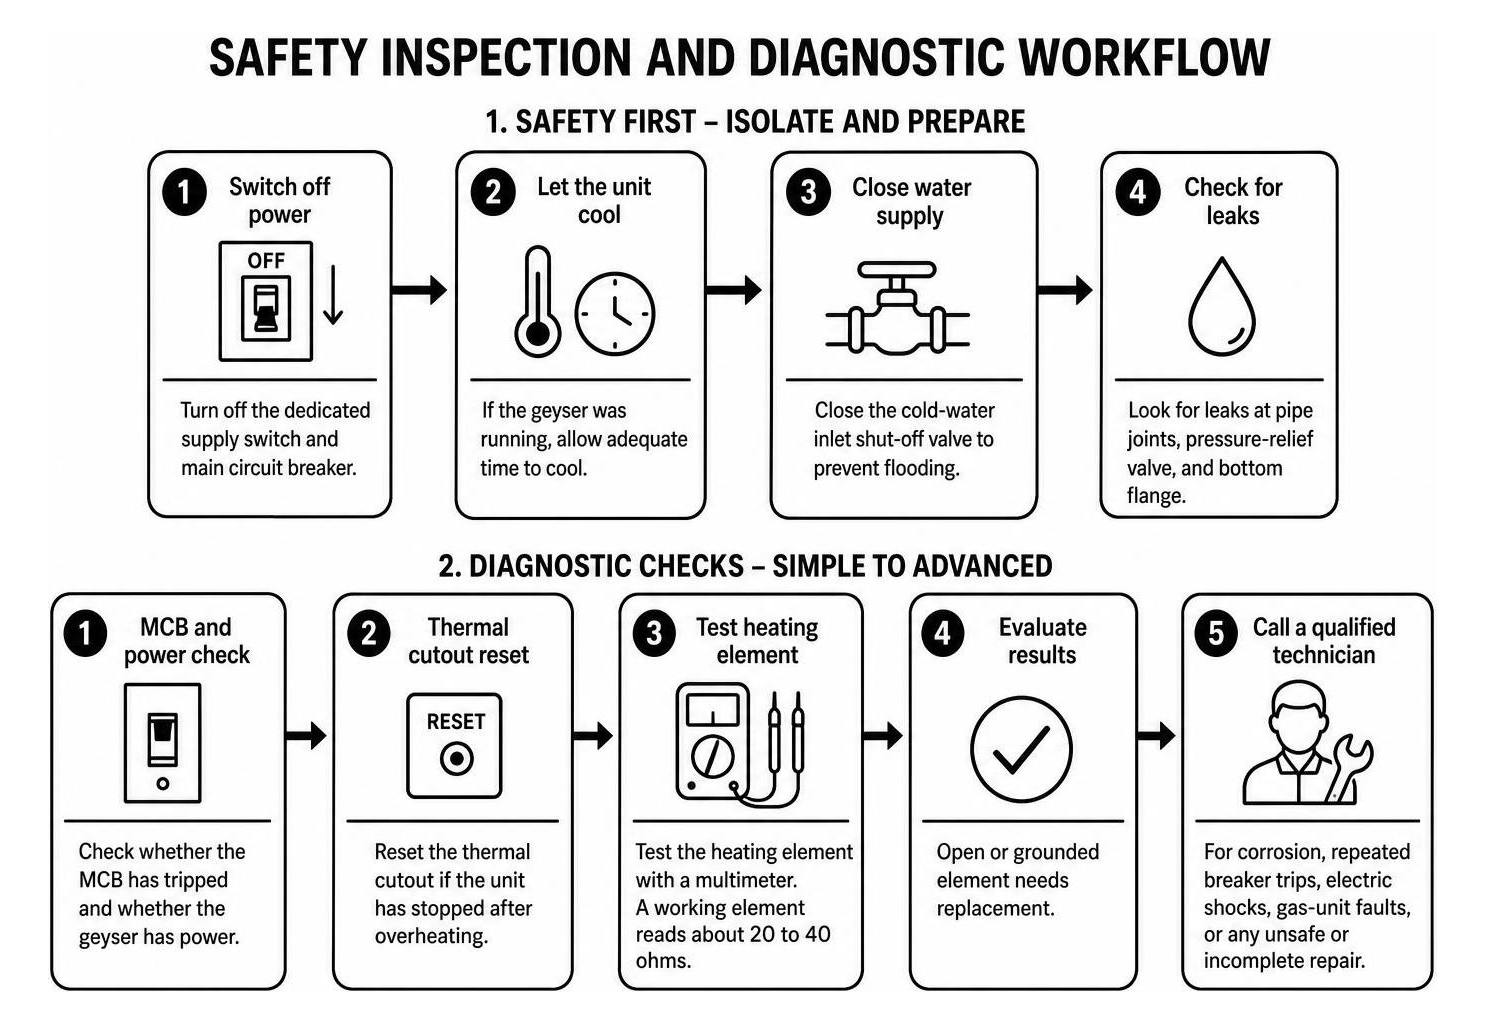
Before picking up a screwdriver, isolate the unit from all utility feeds. Turn off the dedicated power supply switch and the main circuit breaker. If the geyser was running recently, give the internal water adequate time to cool down before opening any valves or drain lines to avoid scalding. Always close the cold-water inlet shut-off valve to prevent accidental flooding.
Electrical Safety Checks in Bajaj Geyser Repairing
Water and electricity make a dangerous combination. Follow these non-negotiable electrical isolation checks before removing service panels:
- Circuit Breaker Isolation: Switch off the miniature circuit breaker (MCB) or residual current circuit breaker (RCCB) feeding the bathroom or utility room.
- Voltage Verification: Use a calibrated digital multimeter or a non-contact voltage tester to verify zero voltage at the geyser's primary terminal block.
- Grounding Continuity Check: Test the continuity between the metal housing or flange and the external grounding/earthing wire. A missing or degraded ground path creates severe shock hazards.
- Capacitive Discharge & Dry Environment: Ensure your hands, footwear, and the surrounding floor are completely dry before handling internal wiring harness terminals.
Required Toolkit and Replacement Components
Having the right tools within arm's reach ensures a smooth repair without stripped screws or leaking fittings.
- Digital Multimeter: For measuring resistance (ohms), verifying circuit continuity, and checking AC voltage.
- Adjustable Pipe Wrench & Socket Set: For loosening inlet/outlet plumbing connectors and the heating element mounting flange bolts.
- Insulated Screwdrivers (Flathead and Phillips): For safely removing outer access covers, plastic shrouds, and wiring clamps.
- Plumber's Thread Seal Tape (PTFE): For sealing all threaded pipe joints and valve threads.
- Bucket, Drain Hose, and Towels: For catching residual water during tank drainage.
- Model-Matched Replacement Parts: Keep an OEM-spec heating element (matching original wattage and immersion length), a replacement thermostat, and a fresh flange rubber gasket ready.
Troubleshooting Common Heating and Power Failures
When a water heater fails to warm water, it usually stems from a triggered safety device, a broken electrical loop, or mineral buildup choking heat transfer.
Testing and Resetting the Thermal Cutout Switch
The thermal cutout (or high-limit safety switch) protects your geyser from boiling over if the primary thermostat fails to disconnect power at the preset temperature. If your unit seems completely dead, check out this How to Repair Bajaj Geyser [Complete DIY Guide] for helpful foundational concepts on safety resets.
- Turn off the main electrical feed at the breaker panel.
- Unscrew the bottom plastic inspection panel to expose the thermostat assembly and safety cutouts.
- Locate the thermal switch, which features a small red or black manual reset button.
- Press the button firmly until you hear or feel a distinct mechanical click.
- Using your multimeter set to continuity mode, place the probes across the switch terminals. If the meter beeps or reads near zero ohms, continuity is restored.
If the switch trips repeatedly after resetting, do not bypass it. Frequent tripping indicates that the primary thermostat is stuck closed or severe sediment accumulation is causing the tank base to overheat.
Advanced Diagnostics and Bajaj Geyser Repairing Solutions
When power reaches the water heater but no heating occurs—or if the breaker trips the second the unit turns on—test the heating element directly.
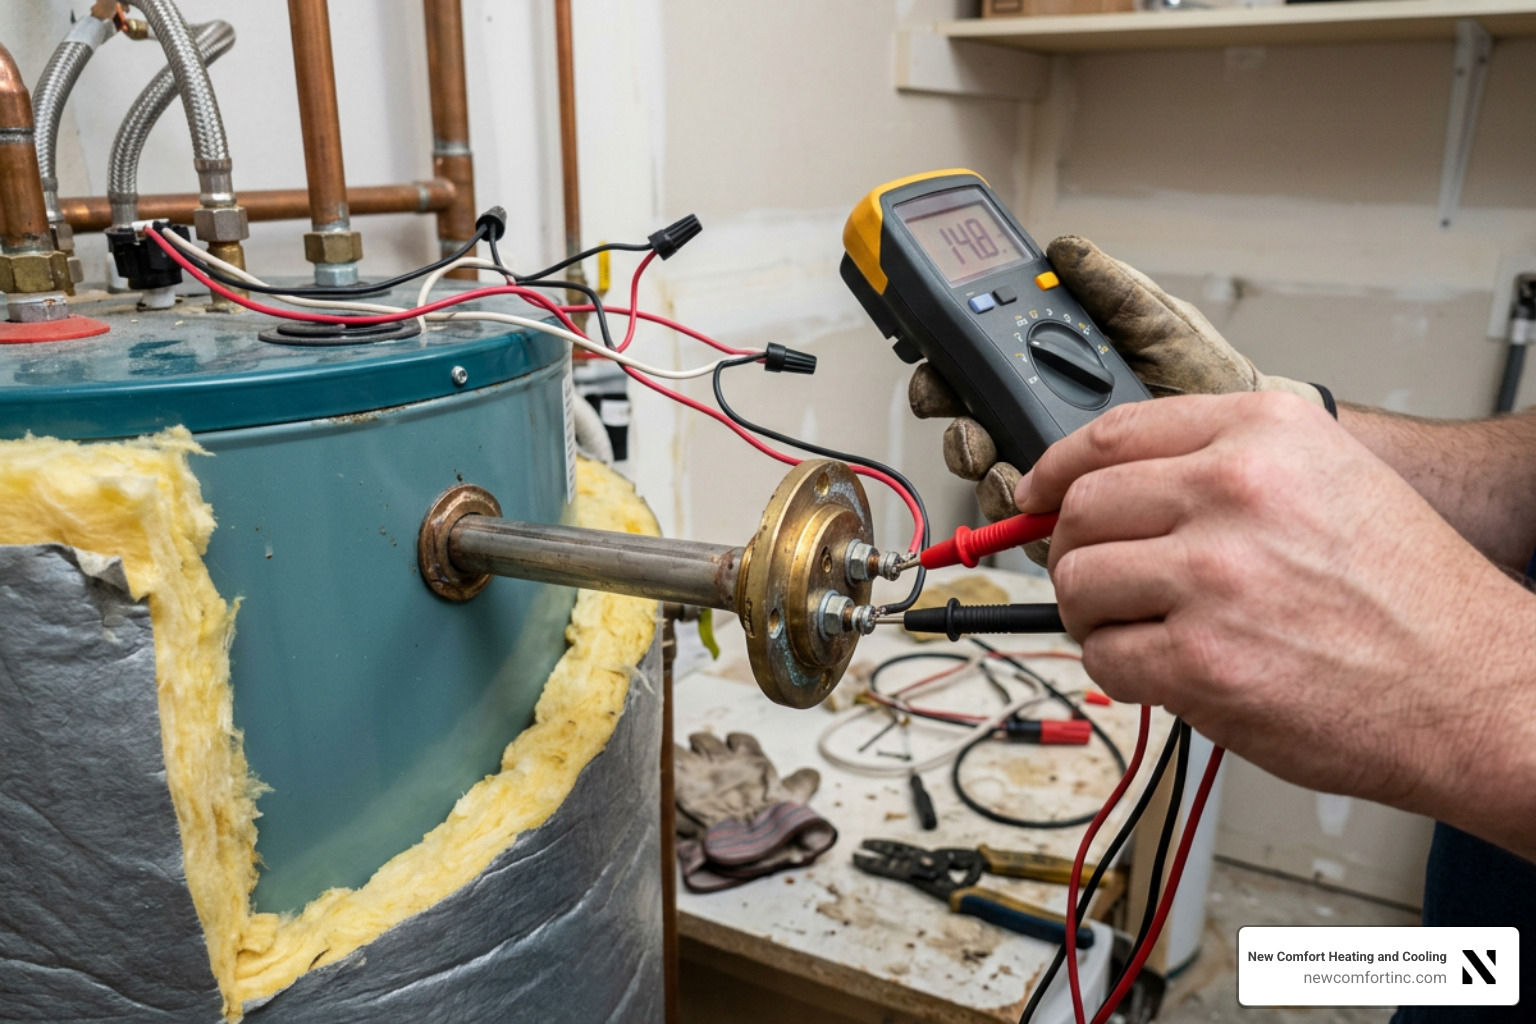
Set your digital multimeter to measure resistance (Ohms/$\Omega$):
- Standard Operating Resistance: Disconnect the two power leads from the element terminals. Place the meter probes on the terminal screws. A functioning element should show a steady reading between 20 and 40 ohms.
- Open Circuit (Burnt Filament): If your meter shows "OL" (Over Limit) or infinite resistance, the internal heating filament has burned out. The element must be replaced.
- Ground Fault Short: Switch your meter to the highest resistance setting or continuity mode. Place one probe on a terminal screw and the other firmly on the metal mounting flange. A healthy element shows infinite resistance. Any continuity or low-resistance reading indicates the outer metal sheath has cracked, allowing water inside and causing the circuit breaker to trip instantly.
Step-by-Step Component Replacement Procedures
Replacing damaged heating components requires steady mechanical handling and clean sealing surfaces.
Replacing a Faulty Heating Element and Flange Gasket
Follow this step-by-step sequence to extract the damaged element and install a fresh one:
- Disconnect Power and Water: Turn off the breaker and shut the cold-water inlet valve.
- Drain the Water Tank: Open a hot-water faucet in the bathroom to break vacuum suction. Connect a hose to the drain outlet or loosen the inlet/outlet connection slowly, catching draining water in a bucket until the tank is completely empty.
- Label and Detach Wiring: Take a clear smartphone picture of the wiring connections for reference. Carefully disconnect the push-on terminals or unscrew the wire nuts attached to the heating element and thermostat probes.
- Remove Flange Hardware: Use a socket wrench to loosen and remove the mounting nuts securing the element flange to the tank collar.
- Extract the Element: Pull the element straight down and out. If heavy scale buildup makes it stick, gently wiggle it back and forth to clear the tank opening.
- Clean and Reseal: Scrape away old gasket residue and scale from the tank mating rim. Position the new rubber flange gasket onto your replacement element.
- Fasten in a Star Pattern: Insert the new heating element into the tank collar. Thread the mounting nuts by hand first, then use your wrench to tighten them incrementally in an alternating crisscross (star) pattern. This ensures uniform gasket compression and prevents leaks.
- Refill Before Powering On: Turn on the water supply and keep hot-water faucets open until a solid, steady stream of water flows out with no trapped air. Inspect the flange joint for leaks before reconnecting the electrical wiring and closing the access panel.
Thermostat Calibration and Installation
A faulty thermostat leads to lukewarm showers or scalding hot water. Most modern mechanical thermostats regulate temperatures between 30°C and 75°C.
- Sensor Insertion: Slide the long capillary temperature sensing probe completely into its dedicated immersion well tube on the element flange. Avoid kinking or pinching the capillary wire.
- Terminal Fastening: Secure the live and neutral supply leads to the designated screw terminals on the thermostat housing, ensuring clean, tight contacts.
- Temperature Optimization: Adjust the temperature dial to approximately 50°C to 55°C (120°F to 130°F). This level provides ample thermal comfort while lowering standby energy loss and slowing mineral scale buildup.
Resolving Water Leaks and Pressure Issues
Persistent dripping wastes water, stains walls, and risks water damage or electrical shorts.
Inspecting and Servicing the Multi-Function Valve
The Multi-Function Valve (MFV)—also referred to as the temperature and pressure relief (T&P) valve—acts as a safety device and non-return valve.
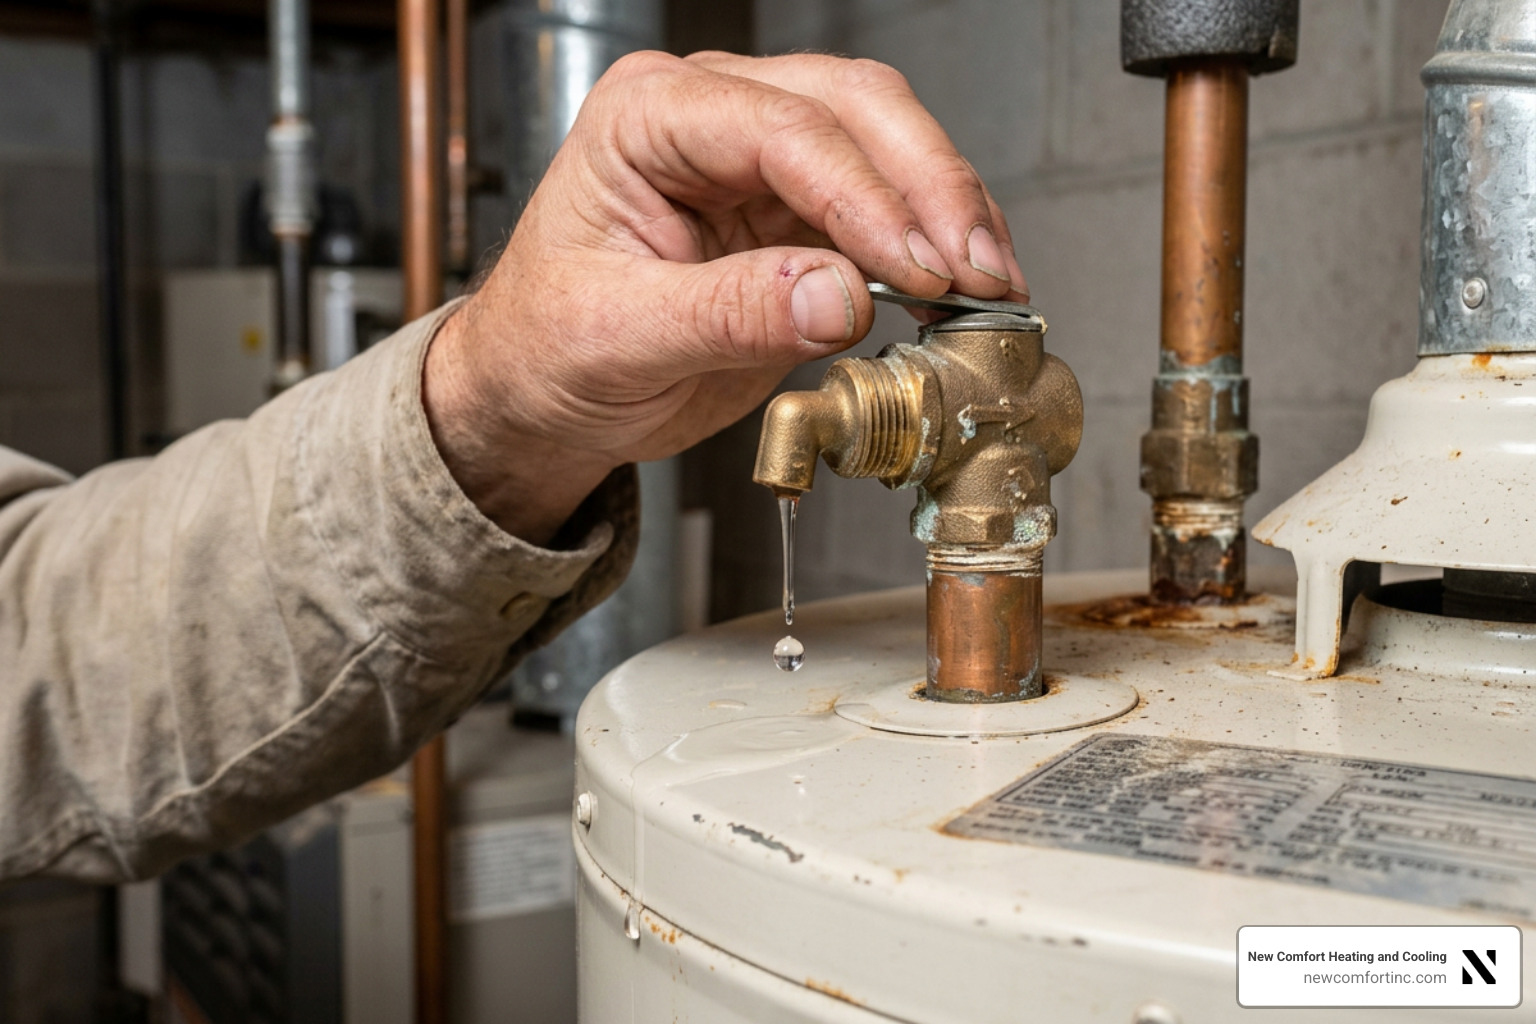
- Normal Pressure Release: During heating cycles, water expands. A small occasional drip from the valve discharge spout is normal pressure equalization.
- Continuous Dripping: If water runs continuously from the valve, mineral scale may be lodged under the internal spring seat, or household water pressure may exceed operating limits.
- Flushing the Valve: Carefully lift the manual relief lever on the valve for a few seconds to flush away loose sediment, then let it snap shut.
- Replacement: If the leak continues, turn off the water line, unscrew the valve with a pipe wrench, apply 4 to 6 wraps of fresh PTFE tape to the tank inlet threads, and install a new pressure relief valve.
Tank Leakage Assessment and Gasket Resealing
- Inlet/Outlet Connections: Inspect the braided flexible hoses connecting the plumbing lines to the geyser nipples. Worn rubber washers inside these connectors account for many common leaks. Replace the washers or apply fresh thread seal tape.
- Flange Gasket Leaks: Water leaking from the lower access shroud typically points to a degraded element flange gasket or unevenly torqued flange bolts.
- Inner Tank Rupture: If water seeps directly through seam welds or outer casing joints, the inner tank has likely corroded through. Internal tank breaches cannot be safely patched and require full unit replacement.
Preventative Maintenance and Descaling Best Practices
In regions with hard water, dissolved calcium and magnesium minerals precipitate out of the water as it heats, collecting as heavy scale at the base of the tank and coating the heating element.
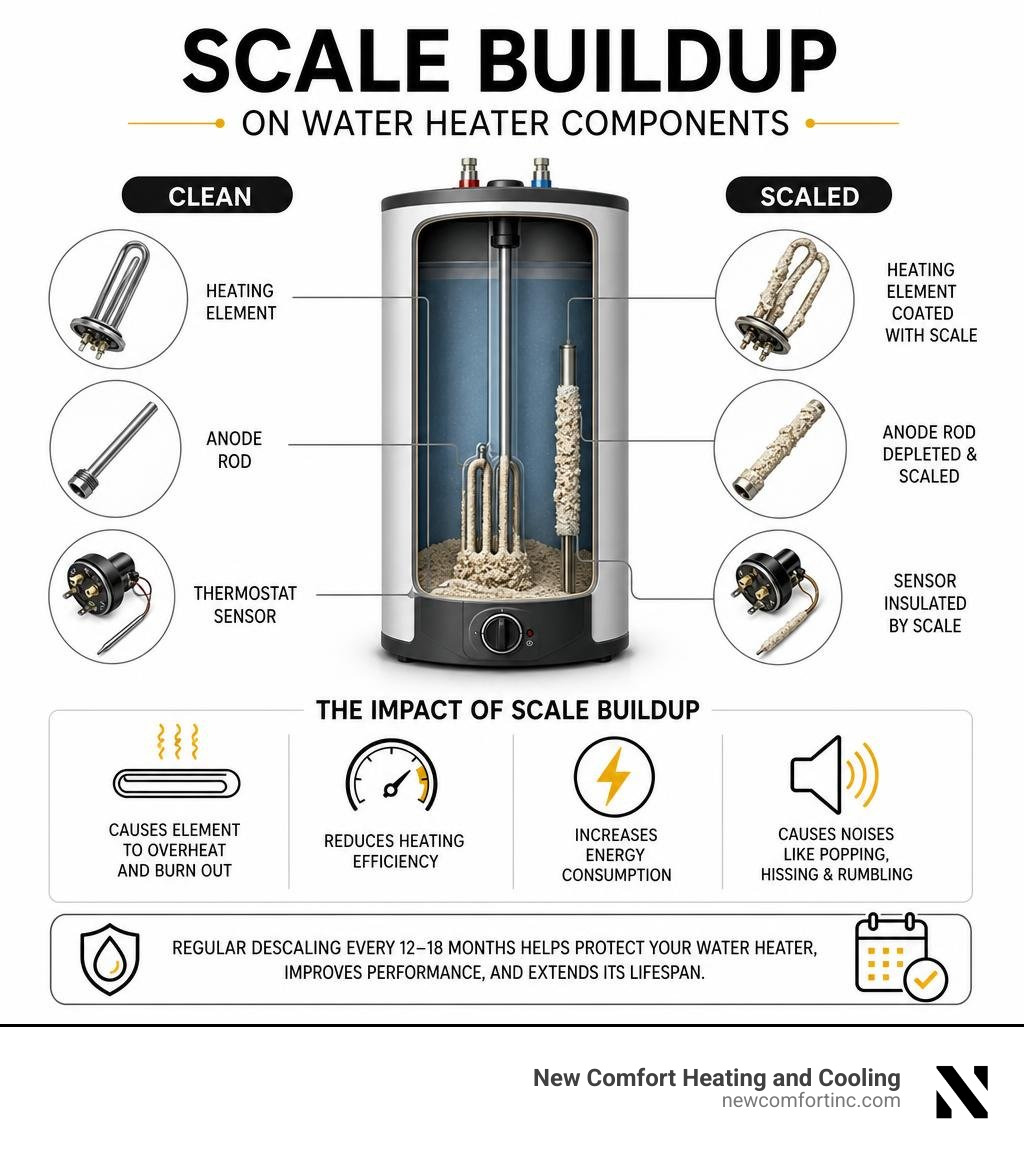
This mineral blanket insulates the element from surrounding water, causing the metal sheath to overheat and burn out while driving up energy consumption. Popping, hissing, or rumbling noises during heating cycles are direct signs of trapped boiling water pockets under heavy scale.
To protect your tank, descale the system every 12 to 18 months:
- Drain the tank and remove the heating element assembly.
- Submerge the scaled element in a descaling solution or a 50/50 mix of white vinegar and warm water until the scale dissolves.
- Flush the lower tank interior with fresh water to sweep out loose mineral sediment.
- Inspect the sacrificial magnesium anode rod. Replace the anode rod if more than 50% of its original core wire is exposed.
| Maintenance Feature | Instant / Tankless Water Heaters | Storage Water Heaters |
|---|---|---|
| Typical Capacity | 1 to 3 Litres | 10 to 25+ Litres |
| Descaling Frequency | Every 18 to 24 months | Every 12 to 18 months (in hard water areas) |
| Anode Rod Inspection | Rarely equipped / minimal rod | Check and replace every 1 to 2 years |
| Primary Failure Point | Rapid heating element burnout / flow switch scale | Tank corrosion, flange leaks, element failure |
| Ideal Household Use | Compact bathrooms, low-volume point-of-use | Multi-person households, simultaneous usage |
Repair or Replace? Knowing When Bajaj Geyser Repairing Is Worth It
Most faults covered in this guide, such as a burnt heating element, a tripped thermal cutout, a worn gasket, or a dripping valve, are inexpensive to fix and well worth repairing. Some problems, however, signal that the tank itself is reaching the end of its service life.
Consider replacing the water heater instead of repairing it when you notice any of the following:
- Rust-colored hot water that does not clear after flushing, which often means the inner tank is corroding.
- Water seeping from the tank body or seam welds rather than from a fitting, gasket, or valve.
- Repeated element failures within a short period, usually a sign of severe scale or tank corrosion.
- Frequent breakdowns on an older unit, where the combined repair bills start to approach the price of a new heater.
- Not enough hot water for your household because family size or usage has grown beyond the tank's capacity.
A useful rule of thumb: if a single geyser repair costs about half the price of a comparable new unit, or the tank is visibly corroded, replacement usually makes more financial sense. When you do upgrade, compare standby heat loss and efficiency ratings. The ENERGY STAR water heater guide explains how more efficient models reduce operating costs over time.
Everyday Habits That Prevent Geyser Breakdowns
Good daily habits make Bajaj geyser repairing far less frequent. These simple practices protect the heating element, thermostat, and tank:
- Keep the thermostat moderate. Running the water heater at 50°C to 55°C instead of the maximum setting slows scale formation and reduces stress on the element.
- Never power on an empty tank. Switching on a geyser before it is completely filled can burn out the heating element within seconds. Always open a hot tap and confirm steady water flow first.
- Turn it off when not needed. For storage geysers, switching off during long absences saves energy and reduces wear on the thermostat contacts.
- Watch the pressure. If your building has high water pressure, a pressure-reducing valve on the inlet line protects the tank, gaskets, and relief valve.
- Inspect connections twice a year. Check inlet and outlet hoses, washers, and the relief valve discharge for drips, and look for scorch marks or loose wiring at the terminal block.
- Use a water softener in hard-water areas. Reducing calcium and magnesium in the supply line is one of the most effective ways to extend element and tank life.
When to Call a Professional Technician
DIY troubleshooting is appropriate for resets, visual checks, and basic part swaps when you are confident working safely. Stop and call a qualified technician if you smell burning plastic, see scorched wiring, feel even a mild shock from a tap or the geyser body, notice the relief valve discharging hot water continuously, or find that the breaker trips again right after a new heating element is installed.
These symptoms can indicate grounding faults, damaged internal wiring, or dangerous pressure conditions that require proper test equipment. For homeowners in Chicago's western and southwest suburbs, New Comfort Heating and Cooling can inspect water heaters and related heating equipment; call (708) 717-9995 to schedule a visit.
Frequently Asked Questions About Water Heater Maintenance
Where is the thermal reset button located on a water heater?
The manual reset button is located on the high-limit thermal cutout switch assembly behind the bottom or front service access panel. It appears as a small, slightly raised red or black button situated near the main thermostat wiring terminals. Always isolate electrical power at the circuit breaker before opening this panel to press the reset button.
Why does the geyser repeatedly trip the circuit breaker?
A geyser usually trips the circuit breaker due to an electrical ground fault caused by a split or corroded heating element sheath. When the sheath fractures, water contacts the internal energized element wire, leaking current directly into the grounded water tank. Damaged wire insulation touching the metal chassis or water leaking onto terminal blocks can also trigger the breaker.
How often should a water heater tank be descaled?
In areas with hard water, descale the storage tank and heating element every 12 to 18 months. Regular descaling clears mineral sediment that traps heat, reduces popping noises, preserves energy efficiency, and gives you a chance to inspect the sacrificial magnesium anode rod.
Conclusion
Routine maintenance and systematic troubleshooting keep your water heating system running safely and reliably. Addressing small symptoms early—such as resetting a tripped thermal switch, clearing sediment buildup, or replacing a worn flange gasket—can save you from unexpected cold showers and costly equipment damage.
Whenever you encounter deep tank corrosion, complex electrical faults, or repairs that feel unsafe to tackle on your own, our skilled team at New Comfort Heating & Cooling is ready to assist with reliable professional heating services to keep your home comfortable and running smoothly.